Winter Barn – My First Cross Stitch Design {free chart!}

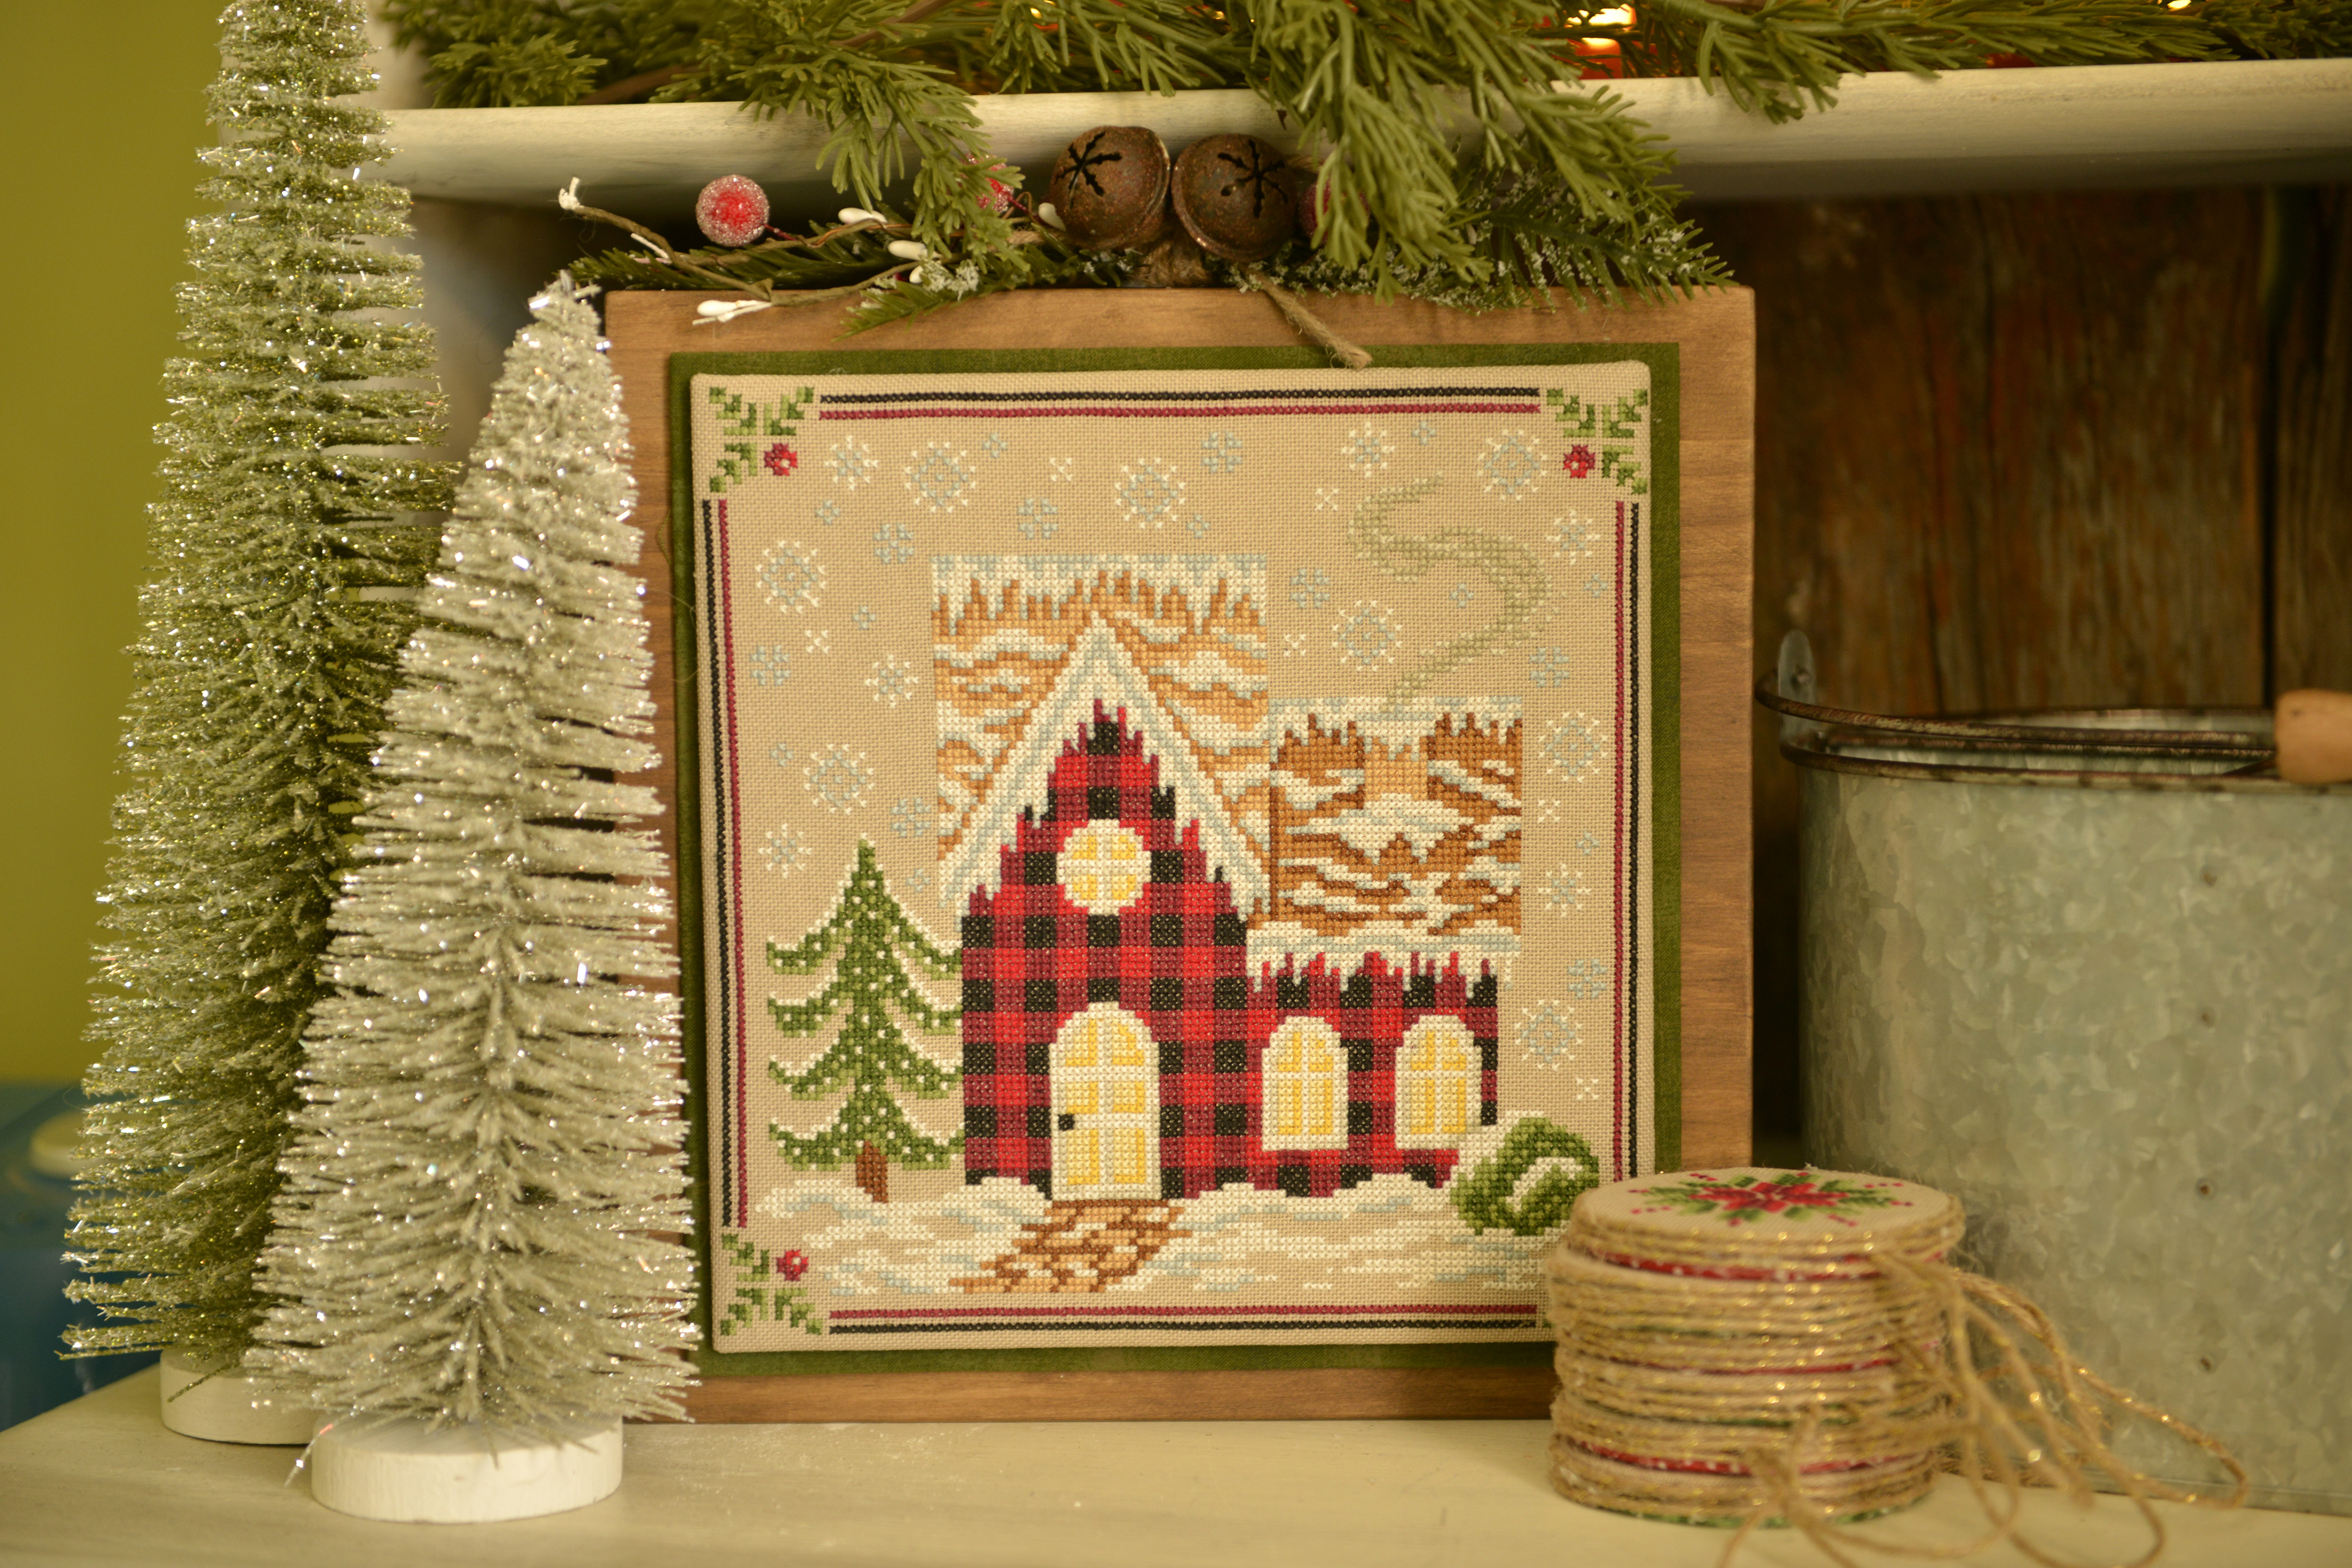
I have felt the push to challenge myself on the designing side of cross stitch lately and it has been a lot of fun. I’ve been sketching on grid paper, just to see what I could come up with, doing lots of quilty stars and snowflakes. In one of my sketching sessions this barn emerged and I was so excited that I dropped all of my other projects to stitch it up!

I love how it came out! It is a completely original design, straight from my sketch pad, but I can’t help but notice the influence of Little House Needlworks, one of my absolute favourite designers, coming out in this design. I am also not surprised, as a farm girl on the prairies, that my first design is of a red barn…I most definitely have a soft spot for them!

If you love this design, I would love to share it with you!

Download the PDF here: Winter Barn Cross Stitch Kim

Or save this image to your computer, tablet, or phone.

If you do stitch it please tag me on Instagram at either of my accounts, @crossstitchkim or @dustyroadkim, I would absolutely LOVE to see it! 

Christmas Cross Stitch Finishes

Wow, we are 4 days into December…how did that even happen? Its been real busy in our house so I am just dipping my toes into decorating for my favourite holiday of the year, Christmas!

Today I am sharing a little parade of my fully finished Christmas cross stitch pieces! As a fairly new stitcher, my collection is small but I am loving having them on display in my home!

Winter Tier designed by Erin Elizabeth Designs. This is a sweet stitch in colours I don’t typically use in my Christmas decor but I was really drawn to them! I finished it on a blank scalloped board from Michaels that I painted white and then dry brushed a little pink on top. I stole the sparkly snowflakes from my stash of Christmas decor to finish it off. I was worried the snowflakes would be a little “over the top” for me, but I am happy with how it turned out and it fits perfectly in this space!

Festive Cardinal designed by Pigeon Coop Designs. A simple finish that I just love! This beautiful little cardinal will be headed to my Christmas tree once I get it set up….although I do really love it in this spot too!

Plaid House designed by Erin Elizabeth Designs. The lovely Erin from Erin Elizabeth designs finished this stitch for me when she borrowed it for a model! This stitch gives you all the warm and cozy vibes and I will be keeping it out all winter long.

Poinsettia designed by Pigeon Coop Designs. I adore these little ornaments and this was so much fun to stitch, as are all of Max Pigeon’s designs! This was a fairly simple finish with fabric on the back and twine wrapped around the outside.

Had to throw this one in! Spice, trying real hard not to be temped by all of the Christmas decor. He has a really hard time keeping his paws to himself!

A Classic Christmas designed by Hands on Design. A sweet and simple finish for this fun stitch, perfect for sitting on my shelf!

Winter Freebie designed by Erin Elizabeth Designs. Yup, this chart is a freebie from Erin, be sure to head over to her website and get yours! I absolutely LOVE this finish, I found this photo frame in a local home decor store and I simply slid the stitch into the little slit meant to hold the photo.

Jolly St. Nick and Rudolph Sip of the Seasons designed by Stitching with the Housewives. If this doesn’t make you smile…than nothing will! I found the little Christmas lights trim at Michaels and knew immediately what chart I would be using them with. Such a fun piece to have in my Christmas decor collection!

I hope you enjoyed this little parade of Christmas designs!

If you would like to see more of what I am up to I would love for you join me on Instagram for daily updates and my brand new YouTube channel for weekly Flosstube updates!

Kimberley’s Fav Chocolate Chip Cookies

It’s officially fall, which typically means pumpkin everything, but I would be remiss not to share the most frequently baked item in our house: my absolute favourite chocolate chip cookies.

Honestly, these cookies don’t scream fall, nor are they the most photogenic…but they are an all-year-round favourite. Rain or shine, cold or warm, they’re the one thing that gets whipped up more often than not in our house. If you’re anything like me and love a good classic, you’ll want to save this one.

These cookies are soft in the middle with crisp edges, perfectly sweet without being over the top, and packed with just the right amount of chocolate chips in every bite. It’s simple, it’s classic, and it’s hard to have just one (which may or may not be a bad thing)!

Happy baking!

Kimberley’s Fav Chocolate Chip Cookies

Ingredients

  • 1 1/2 cups (340g) butter, softened
  • 1 1/2 cups (300g) packed light brown sugar
  • 1 cup (200g) granulated sugar
  • 2 large eggs + 1 egg yolk, at room temperature
  • 2 teaspoons pure vanilla extract
  • 4 cups (500g) all-purpose flour (spooned and leveled)
  • 1 teaspoon baking soda
  • 2 teaspoons cornstarch
  • 1/2 teaspoon baking powder
  • 1/2 teaspoon salt
  • 3 cups (510g) milk chocolate chips

Instructions

  1. Preheat Oven: Preheat your oven to 350°F. Line two or three large baking sheets with parchment paper.
  2. Cream Butter & Sugars: In a large bowl, using a stand mixer or hand mixer, cream together the softened butter, brown sugar, and granulated sugar on medium speed until light and fluffy, about 3 minutes.
  3. Add Eggs & Vanilla: Add the eggs, one at a time, beating well after each addition. Then add the egg yolk and vanilla extract, mixing until fully combined.
  4. Mix Dry Ingredients: In a separate bowl, whisk together the flour, baking soda, cornstarch, baking powder, and salt.
  5. Combine Wet & Dry Ingredients: Gradually add the dry ingredients to the wet ingredients, mixing on low speed until just combined. Be careful not to over-mix the dough.
  6. Fold in Chocolate Chips: Using a spatula or wooden spoon, fold in the chocolate chips until evenly distributed throughout the dough. (I use my stand mixer on the lowest speed to do this step).
  7. Chill the Dough (Optional): For thicker cookies, chill the dough in the refrigerator for at least 30 minutes. This step is optional but recommended.
  8. Form Cookies: Roll the dough into balls, using about 2 tablespoons of dough per cookie. Place them on the prepared baking sheets, spacing them about 2 inches apart.
  9. Bake: Bake in the preheated oven for 10-12 minutes, or until the edges are set and lightly golden, but the centers are still soft and slightly under-baked.
  10. Cool: Allow the cookies to cool on the baking sheets for 5 minutes before transferring them to a wire rack to cool completely.

Kimberley’s Tips:

  • Room Temperature Ingredients: Make sure your butter, eggs, and egg yolk are at room temperature for the best texture.
  • Chilling the Dough: Chilling helps control the spread of the cookies and enhances flavor. For a more intense flavor, chill the dough for up to 24 hours.
  • Don’t Overbake: The cookies will continue to cook as they cool on the baking sheet, so take them out of the oven when they look slightly underdone in the center.
  • Yield: This recipe makes about 36 cookies, I like to make a big batch!

Pumpkin Spice Caramel Popcorn

This recipe strikes the perfect balance between sweetness and spice, with a crunchy caramel coating you can’t resist!

It’s Pumpkin Spice season! I know, I know…it feels so overdone, but lets be honest, everything tastes better with this cozy blend of spices!

I used to make Caramel Popcorn by the bucket load to sell at our local men’s baseball games…go Giants! This is the same recipe but with a yummy fall twist.

It’s crunchy, perfectly sweet, with just the right touch of autumn flavour. Pair it with a cozy evening curled up on the couch watching your fav chick flick or Halloween movie!

Enjoy this spiced caramel goodness. Bonus, your house smells amazing while is baking!

Pumpkin Spice Caramel Popcorn

  • 1/2 cup popcorn kernels (about 10 – 12 cups popped)
  • 1 cup salted butter
  • 1 cup light brown sugar, packed
  • 1/4 cup light corn syrup
  • 2 tsp pumpkin pie spice (I used Club House)
  • 1/4 tsp salt
  • 1 tsp vanilla extract
  • 1/4 tsp baking soda

Preheat your oven to 250 Fahrenheit and line two baking sheets with parchment paper.

Pop the popcorn and set aside in a large bowl.

In a saucepan, melt butter, corn syrup, salt, and pumpkin pie spice. Stir and bring the mixture to a boil, then let boil for 4 minutes without stirring.

Remove from heat and stir in vanilla extract and baking soda until the mixture becomes foamy.

Immediately pour the caramel over the popcorn and toss to coat evenly.

Spread the coated popcorn on the baking sheets and bake for 1 hour, stirring every 15 minutes for even crispiness.

Remove from the oven and let popcorn cool completely.

Store in an airtight container once cooled.

‘Dream It’ DIY Wall Decor

If you’ve been following me for a while, you may know that not too long ago I owned a boutique and we were creating a line of our very own graphic print tops. The boutique has recently closed and I’ve been left with a collection of great graphic designs and a desire to find new ways to use them! That’s how this little project came to life!

Repurposing our graphic prints into art was a no-brainer. It brings a piece of something I worked so hard for into my home, and allows me to share something meaningful in a fresh and beautiful way.

This is one of the exclusive designs I own that we had originally made into a t-shirt! I had it printed as a 16×20 print on poster board and mounted it into a frame I recently refurbished. It is flanked by two beautiful pieces that were gifted to me, they are woodwork art made by the very talented Jynae Bergeron of Art and Airplanes. They are stunning and work perfectly in this space!

I have many more ideas of designs I want to do, so I have set up this frame to be easy to switch out. Stay tuned for more fun things!